Get control of your Dynamics 365 SharePoint integration with Power Automate

Collaboration has always been at the heart of the Power Platform and Dynamics 365 and over the years Microsoft has continually added integrations with its other applications in order to make collaborating and sharing information easier.
SharePoint is a prerequisite for many of these other integrations and enabling the default integration in your model driven apps is easy. In this post, however, we are going to take it a step further and get some additional control over our SharePoint integration with the use of Power Automate.
Let’s get started by navigating to the Power Platform admin centre and selecting the environment you want to enable the integration in. Select Settings -> Integration -> Document management settings, then select Enable server-based SharePoint Integration.

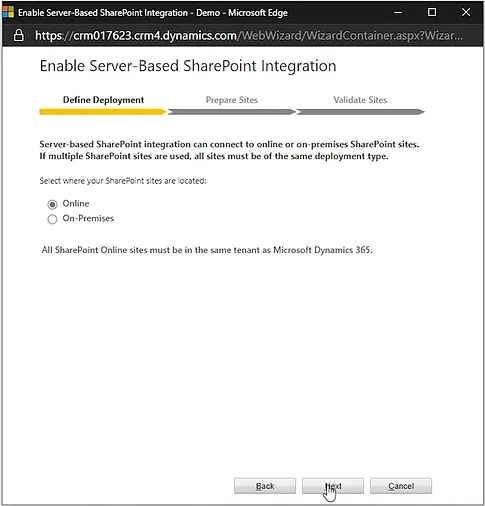
In the wizard that opens select where your SharePoint sites are located. I’m using SharePoint Online so I’m going to select Online and click Next.
Now enter the URL of your SharePoint site that you want to use and click Next again.
The URL will be checked to make sure it's a valid SharePoint online site and that it exists in the same Microsoft 365 tenant as your Power Platform environment.
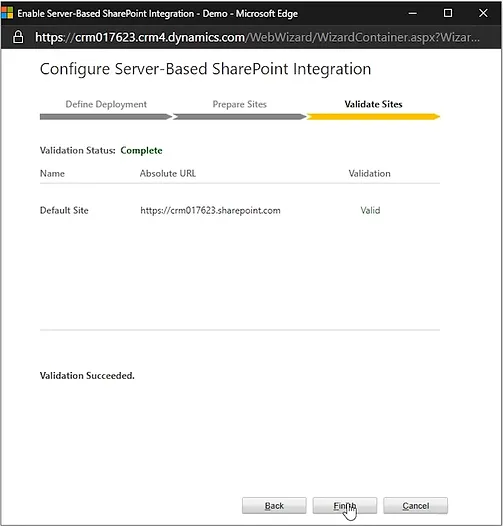
Once these checks have passed you can click Finish, to enable the integration.
Now with the integration enabled, if we want the Power Platform to automatically manage the SharePoint folders that are linked to our records we need to run through the Document Management Settings wizard in the Document Management section of the settings.
In the first step we can select the entities that we want document management to be enabled on, you can see that most of the main entities that you would want documents enabled on are already selected, but feel free to add any additional entities you might need.
Next add the SharePoint site that you want to be used to store your documents. I'm just going add my root SharePoint site and click Next.

In the next step we can define how we want the folders to be structured. If we leave this blank, a folder for each entity will be created in our document repository and a folder for each record within that entity will be created within that entity folder.
However, If we want our folders to be grouped by either account or contact we can select the appropriate entity that we want our folders to be grouped by.
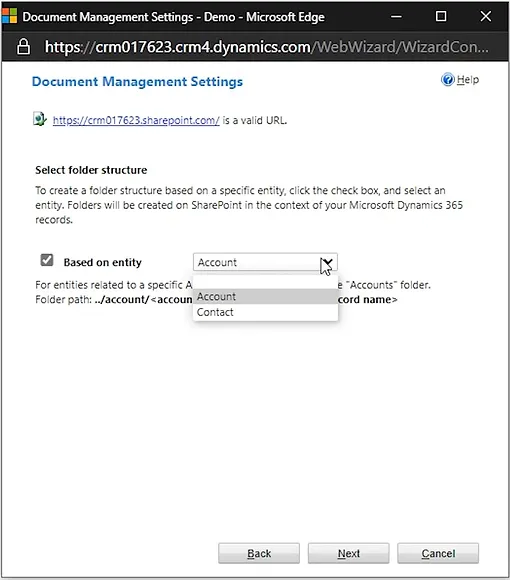
I'm going to leave mine unchecked for simplicity and click Next.
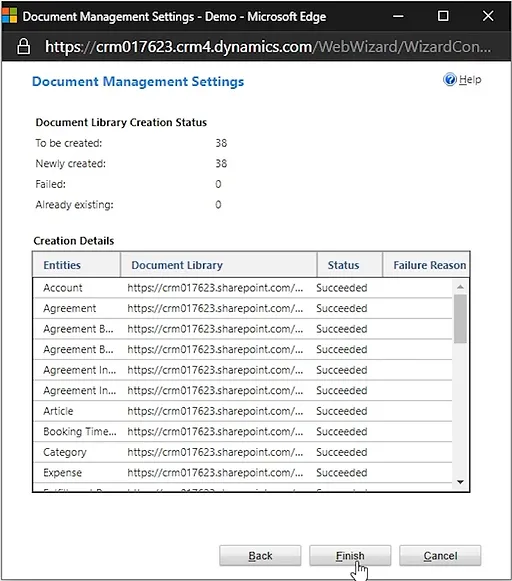
In the final step of the wizard you will see the entity folders being generated, once this has finished, click Finish to close the wizard.
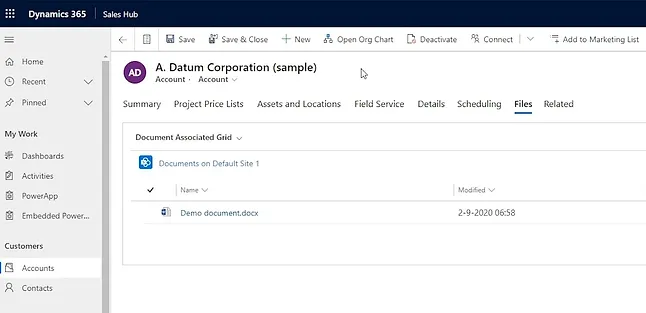
So now let's take a look at an account record in the Sales Hub to check how the integration is working.
When we navigate to the files tab on any enabled entity for the first time a folder is generated in the appropriate entity folder on SharePoint and is linked to our record. From within the model driven app interface we can create new files as well as upload existing files we have stored locally.
If we take a look at SharePoint we can see a new communication site has been set up for us with a document library for each of our entities, if we open up the Account library we will see the folder for the account we were just working on and inside we can see the files that we just uploaded.
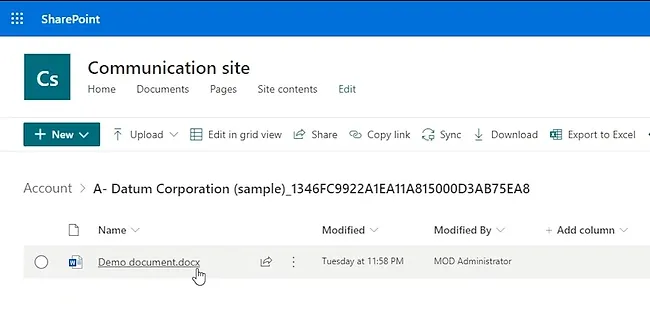
As you would expect I can work on existing files and upload new files through the SharePoint interface and any changes will be visible immediately within our model driven app.
As you can see setting up the integration with SharePoint is pretty straight forward if you are happy to accept the default way that the integration handles folder management. But what if you have already invested a lot of time managing your SharePoint sites and you want some more control over where the folders are created.
Let’s take a look behind the scenes at what is going on with the default integration and see what we can do to get back some more control.
If we navigate back to our Document Management settings and start by taking a look at SharePoint sites. we can see that our SharePoint site that we configured with our integration has been created as a record called Default Site. We can also see that we have the ability to create new SharePoint sites manually should we wish to.

Next let’s take a look at SharePoint Document Locations, here we can see that we have a few different entries, some we can see point to our Document Library for our entities that reside in our Default Site and some that point to the record folders within those Document Library locations with a reference to the record that the document location is regarding.
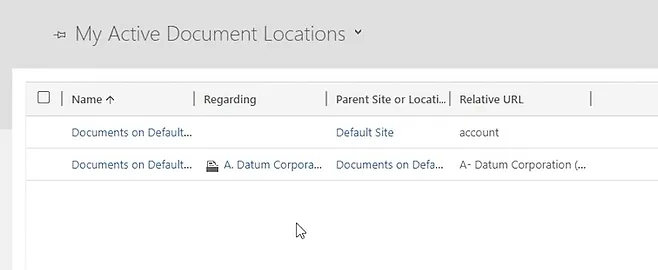
So with this information in hand let’s see if we can replicate this functionality and gain back some control over how we manage our SharePoint structure.
Let’s start by creating a new site in SharePoint.
Navigate to SharePoint, click Create Site and select the type of site you want to create, I’m going to pick a Communication site..
Give your site a name, a description if you would like, select the default site language, make a note of the site URL and then click Finish.
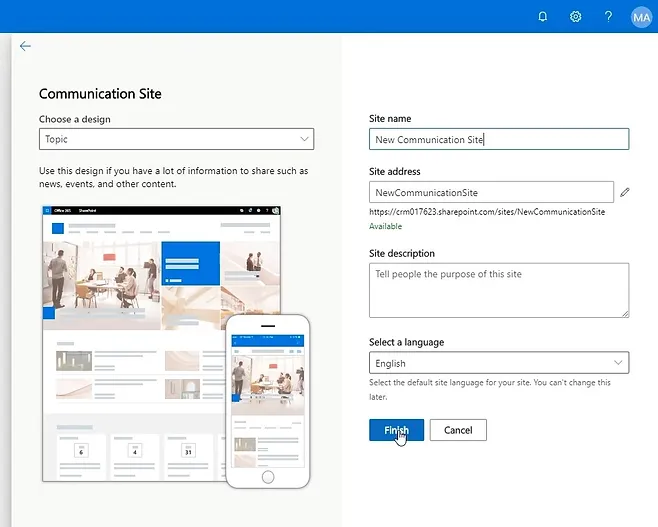
Now let’s head back to our Power Platform Document Management settings and create a new SharePoint site record for the site we just created. As we already have a reference to our root SharePoint site, we can use this in the Parent Site and add the a relative URL. Select the check box to indicate that our list component is installed and click save and close.
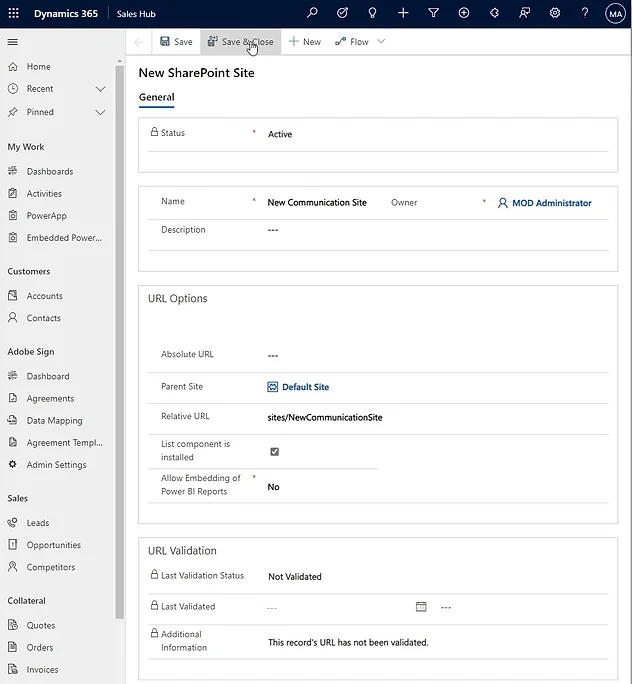
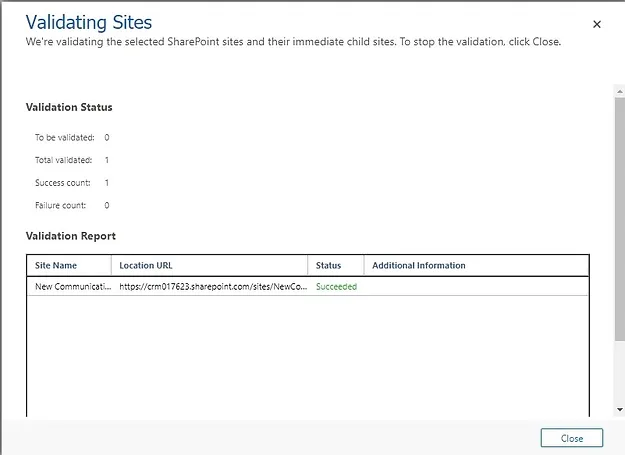
Back in our list of SharePoint sites, select the record we just created and click Validate on the command bar to validate the site's URL.
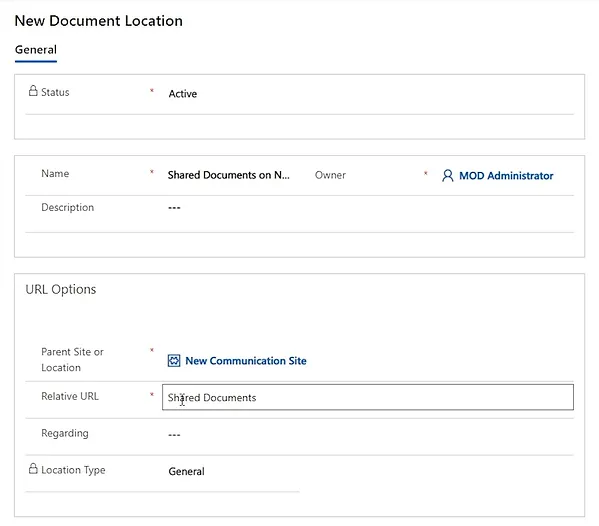
Next we are going to create a new document location record to reference our Shared Documents library on our new SharePoint site. This is where we are going to create our record folders on our new SharePoint site. So let’s navigate to Document locations and click new.
Let’s give our Document location a unique name as we are going to need to reference this later, select our parent site, add Shared Documents as our relative URL and click Save and Close.
Now with our site record and document location created, we now need a way to generate the folders and document location records for our entity records and for that we are going to use Power Automate.
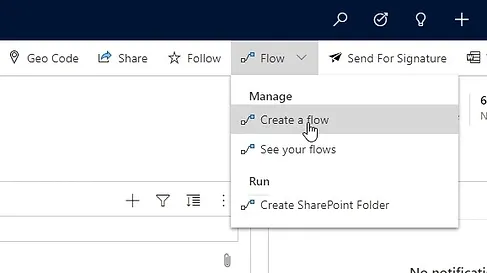
Let's navigate to a record of the type that we want to trigger our Power Automate flow from. I'm going to select an account record and on the command bar, click flow and select create a flow.
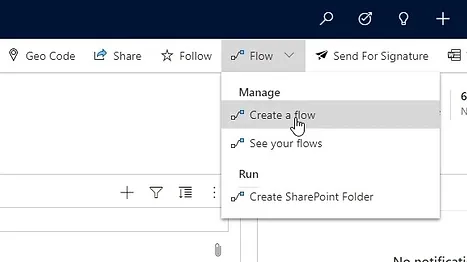
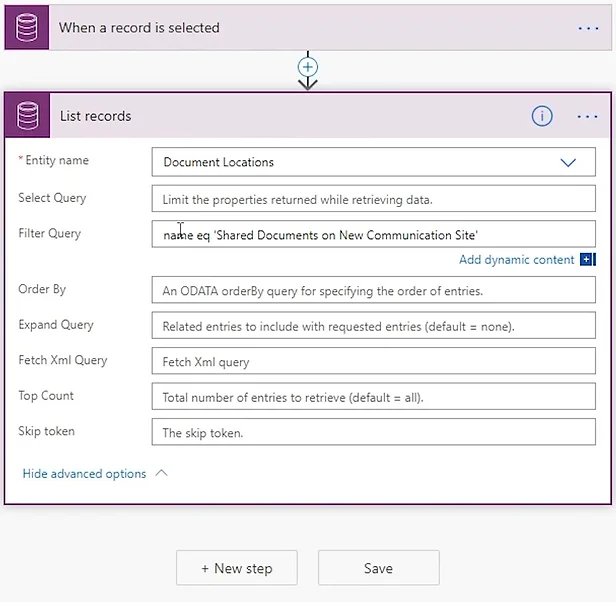
Let’s start by giving our flow a meaningful name. Now in our flow the first thing we are going to want to do is fetch the Document Location record that relates to the Shared Documents repository on our new site. So let’s click new step and search for our common data service connector and select the list records action.
Select the entity we want, which in this case is Document Locations and then in the advanced options we’ll add a filter query to return the specific record we are looking for.
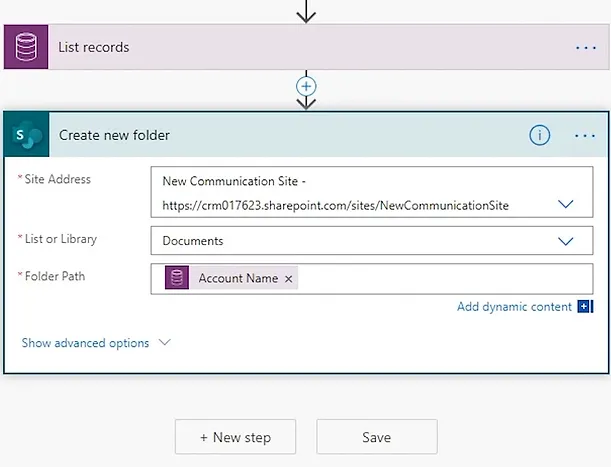
Next we are going to want to create the folder on SharePoint, so let’s add another step and search for the SharePoint connector and select the create new folder action. In the site address we are going to select our newly created site, in list or library we’ll select the Documents library and in the folder path we will add the Account Name of the record that this flow was triggered from.
Now our final step is to create the document location record that links our new SharePoint folder with our Account record.
So let’s add another new step, search for our Common data Service connector and this time select the Create new record action.
In our entity name we select Document Locations again and we’ll give it a name again using the Account Name from the record that the flow was triggered from.
In the Service Type let’s select SharePoint.
In the Parent Site or Location field, we need to add a reference to the Document Location we retrieved earlier in the flow and as this action returns a list of records, even though we are only expecting a single record to be returned, we want to select the first record in the list.
In the regarding (Accounts) field we’ll put a reference to the Account that the flow was triggered from to connect it up to the appropriate account record.
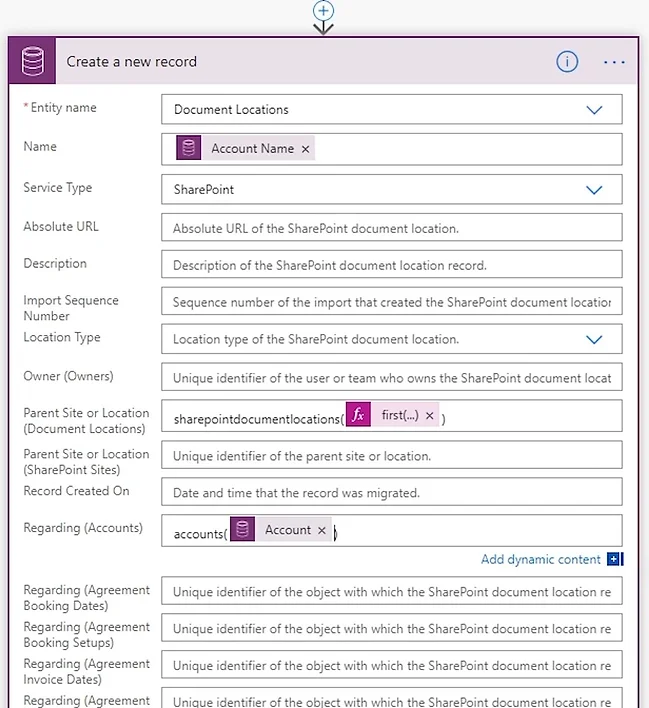
And finally in the Relative URL field, will add the name of the folder that we created in the previous step in our flow.
So let’s save our flow and see it in action. As before we’ll navigate back to our account record and click on the flow button in the command bar. This time you can see that our flow appears, so let’s click on it and run the flow.
Now flows run in the background so it might take a few seconds to complete, but once it has. If I navigate to the files section of this record you will see our account record is now connected up to our new SharePoint folder. As before I can upload and create new files and if I navigate to our new SharePoint site and check out the document library, you will see our new account folder and files.
Latest Posts
With the Unified Interface, Microsoft replaced Learning Path with Custom Help Panes, allowing organizations to add contextual, app-specific help content for users, including formatted text, images, videos, links, and interactive prompts like coach marks and balloons, guiding users through tailored navigation and support.

Microsoft's Forecasts provide a streamlined approach to track sales progress and manage quotas with a more flexible, hierarchical structure.

The Kanban method is now available in Dynamics 365, allowing users to manage opportunities and activities visually through a customizable Kanban board.


