First 5 things to do before getting started with Dynamics 365

So you’ve got your hands on some Dynamics 365 or Power Apps licenses and you’re ready to get started. Well first of all, let me welcome you to the wonderful world of the Power Platform and Dynamics 365.
So what's next? Well before you get stuck in provisioning your environments and creating your apps here are five things that you should do before you start, to make sure you set off on the right foot.
1. Create Security Groups
Typically when you provision new environments you are going to want to limit the users that can access each one. The way that you do this is with a security group.
Each environment can be linked to a single security group and anyone that is in that group and has a valid Dynamics 365 or Power Apps license will be automatically added to that environment as an enabled user.
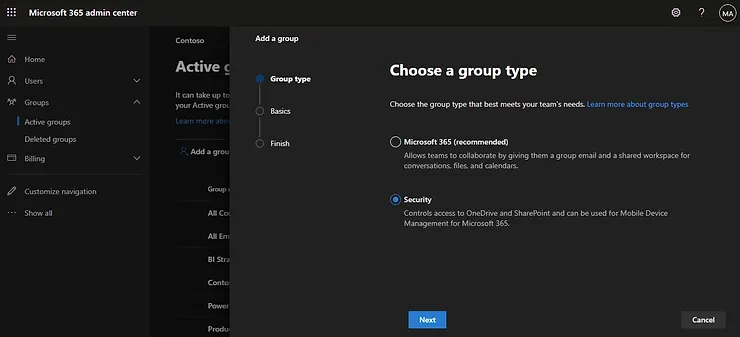
You can create security groups in the Microsoft 365 admin centre (https://admin.microsoft.com/). Head into the ”Active Groups” area and click “Add a Group”, select “Security” as the group type, click "Next", give your group a name and then click “Create Group”.
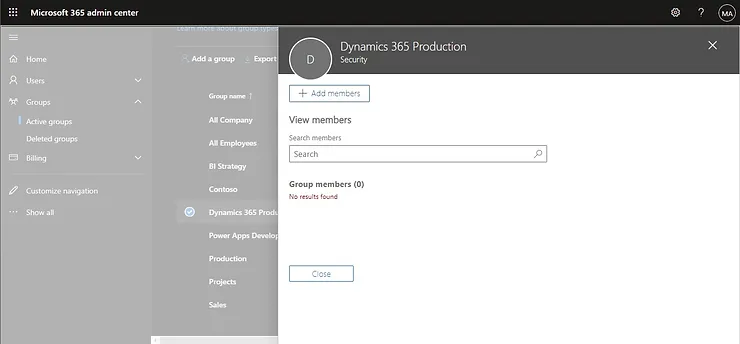
Now with your group created you can manage group members by opening up the group and clicking into the “Members” tab, selecting “View all and manage members” and then “Add members” to add new members to the group.
Alternatively, you can manage the groups of an individual user, by opening up their user record, clicking “Manage groups” and then add memberships to add the individual user to the new security group.
2. Provision production and sandbox environments
Now that you have your security groups set up, you can provision your environments. You are obviously going to want to create at least one production environment, that’s where your live data is going to live and the environment that most of your users will have access to.
You are also going to want to create at least 1 sandbox environment for each production environment you have and using the security groups you have set up you are going to want to limit access to each environment by applying a different security group to each.
A sandbox environment is where you are going to create and test any changes or customisations that you might want to make before deploying them into your production environment.
To provision an environment you need at least 1GB of free storage. You can check out your available storage in the Power Platform admin centre (https://admin.powerplatform.microsoft.com/).
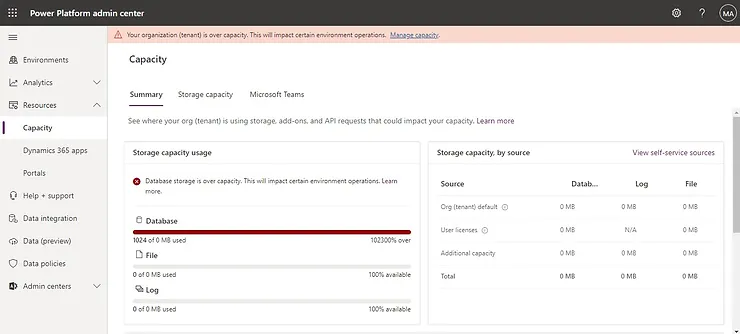
It is here you can also create new environments by clicking on the “New” button.
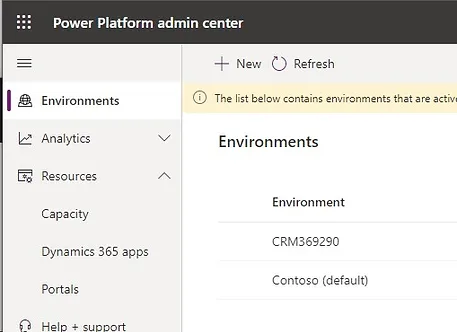
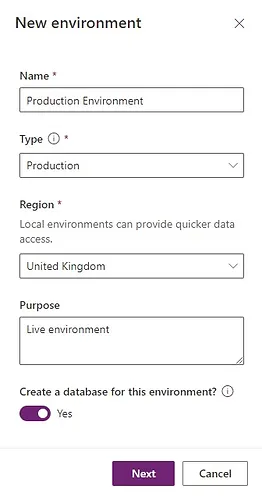
Give your new environment a name and select the type of environment you want, remember you are going to want at least one production environment, and one sandbox environment for each production environment. Select the Region you want the environment to be created in, add in a description for the environment and select whether you want a Dataverse database for the environment. If you are planning on using Dynamics 365 you are going to want to select ”Yes”. In fact, unless you have a specific reason not to, I would always select “Yes” to creating a Dataverse database.
On the next screen select the default language for the environment, then choose the URL which users will use to access the apps within this environment. This needs to be unique so spend some time thinking about what makes sense here, if you are planning on having a lot of environments then deciding on a naming convention for the URLs can help users find the right environment more easily.
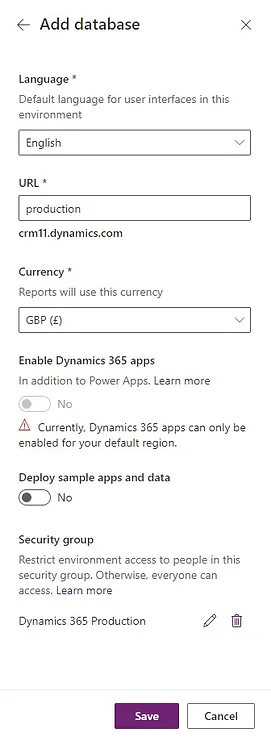
Next up select the base currency for the environment and then whether you want to enable the Dynamics 365 apps, if you select yes here, you can then select which apps you want to deploy.
Last but not least, select the security group that you want to link to this environment. Remember that in order to gain access to this environment, users will need to have a valid license and be in this security group before they will be able to login to the system.
3. Assign licenses to users
So now it’s time to give your users access and we do this by assigning a license, you can do this in the Microsoft 365 admin centre (https://admin.microsoft.com/). Head over to the Active users list and select the user that you want to assign a license to and select “Manage product licenses”, you’ll then see a list of the users current and available licenses. Select the license that you want to enable for the user and click “Save Changes”.
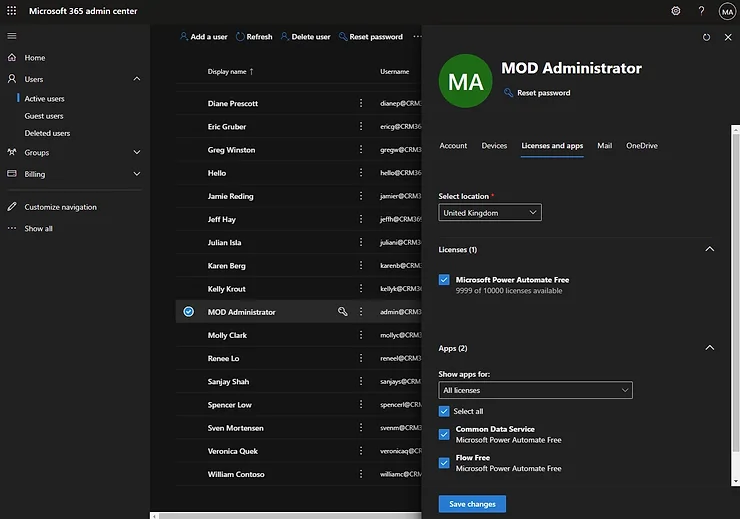
While you are here, click on the “Account” tab and from here you can also manage this users groups to make sure they are in the right security groups for the environments that you want to give them access to.
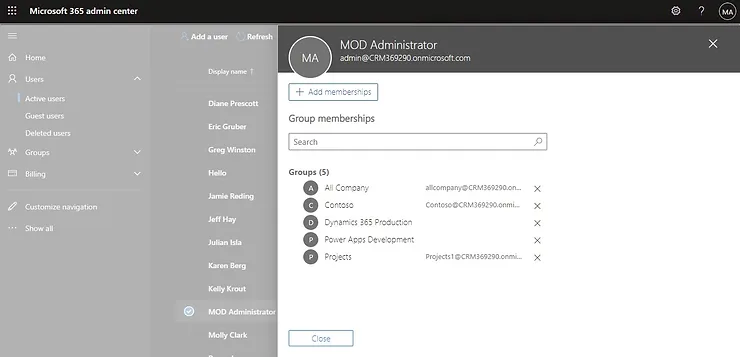
Once we have done all this, the user will appear in the Power Platform environment as an enabled user and should be able to login. But before they are able to do anything you will need to give them a security role.
4. Assign security roles
While assigning licenses and security groups gives your users access to a Power Platform environment, when they log in they will find that they won’t be able to do very much. This is because by default they won’t have any security roles associated to their user record so won’t have permission to do anything. To change this, head on over to the Power Platform admin centre (https://admin.powerplatform.microsoft.com/) and select the environment you want to manage security roles for then click Settings -> User and permissions -> Users.
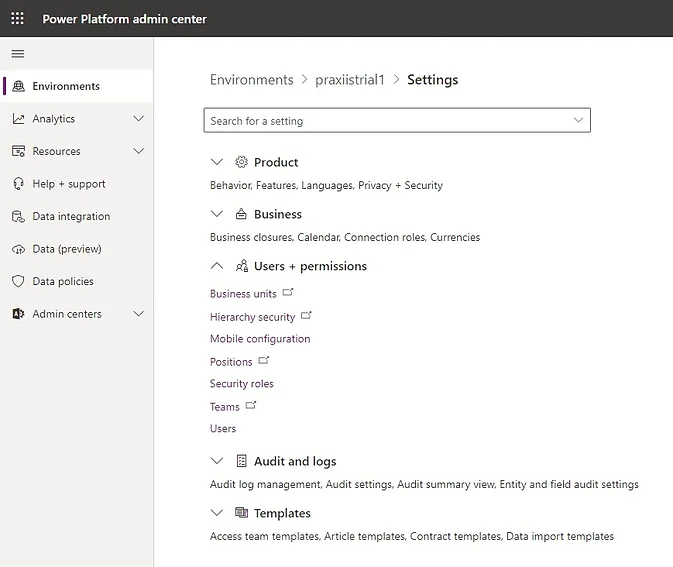
Open the user that you want to assign a security role to and click “Manage roles”. Here you can give the user the appropriate security roles to give them the permissions they need.
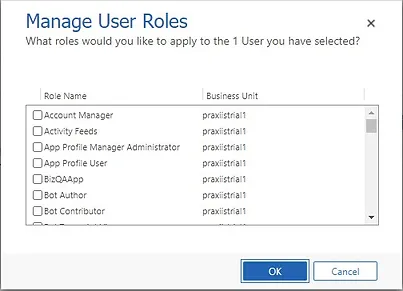
Users can have multiple security roles and the privileges within each are additive so, for example, if you give someone a sales role and a customer service role they will have access to both parts of the system.
There are several out of the box security roles that you can use, or you can create your own security roles, but if you do it’s always best to copy an existing role that closely matches what you need and then edit the new copy of the role.
5. Enable mailboxes and deploy the Outlook App
One of the major selling points of Dynamics 365 is it’s close integration with Office 365 and especially Outlook, so it’s definitely something I had to include in this list.
Now that your users have access to the system they are going to want to be able to sync their emails and appointments into Dynamics.
While you are still in the user records you first need to approve the users mailboxes, which you can do by clicking the “Approve Email” button on the command bar.
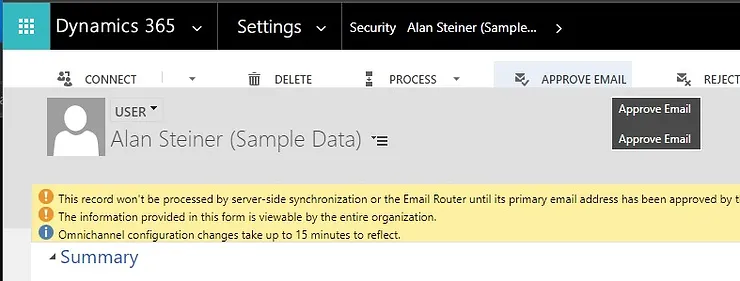
Once that’s done you’ll need to test and enable their mailbox. This is going to enable the server side synchronisation of incoming and outgoing emails with their mailbox, so not only will they be able to track email sent in and out of their mailbox, but they’ll be able to send emails from within Dynamics directly.
Head over to the users mailbox, again you can do this from the command bar by clicking “Open Mailbox”.
In the window that opens, in the “Synchronization Method” section you can see what is going to be synchronized with Exchange, you can change these options in this section if you need to, but when you are ready click “Test & Enable Mailbox” in the ribbon menu.
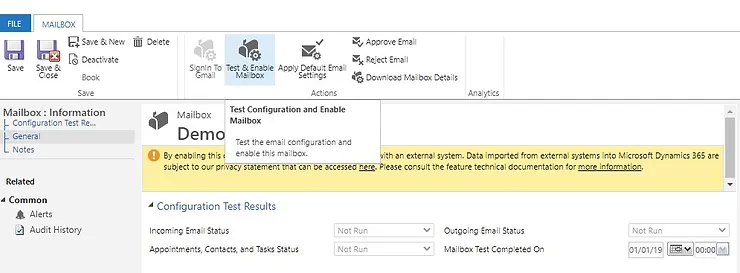
This might take a while to complete, but once it’s finished you should see “Success” in the appropriate test result fields at the top of the mailbox form.
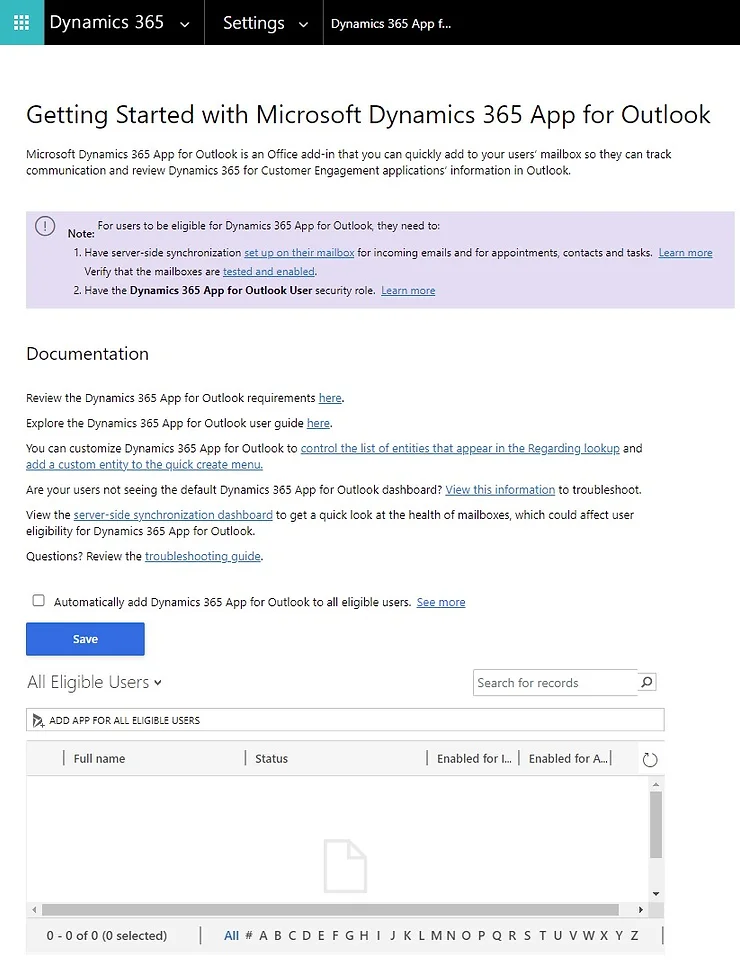
Once the mailboxes have been enabled, head on over to the “Dynamics 365 for Outlook App” settings area to push the outlook app out to all of the eligible users. This will give them the ability to access Dynamics 365 from within Outlook allowing them to not only track emails, but to interact with Dynamics 365 data from within Outlook itself.
You can enable the app for individual users using the grid at the bottom, you can click “Add App for all eligible users” to enable it for all currently eligible users or check the “Automatically add Dynamics 365 for Outlook to all eligible users” check box to have the app pushed automatically for any newly enabled mailboxes.
So there you go, the first 5 steps you should follow to get started with your new Dynamics 365 environments. If you have any questions please feel free to leave a comment below.
Latest Posts
With the Unified Interface, Microsoft replaced Learning Path with Custom Help Panes, allowing organizations to add contextual, app-specific help content for users, including formatted text, images, videos, links, and interactive prompts like coach marks and balloons, guiding users through tailored navigation and support.

Microsoft's Forecasts provide a streamlined approach to track sales progress and manage quotas with a more flexible, hierarchical structure.

The Kanban method is now available in Dynamics 365, allowing users to manage opportunities and activities visually through a customizable Kanban board.


